The friction sweeping system designed to collect debris from synthetic sports fields while simultaneously grooming their turf fibers.
Help ensure a safe and hygienic playing surface by removing debris, contaminants, and foreign objects from your field.
Condition turf fibers and redistribute infill to ensure an optimal playing surface for athletes at all levels.
Prevent surface compaction and prolong the lifespan of your sports field, protecting your investment for years to come.
Available in several sizes and configurations, all designed to be towed behind golf carts, UTVs, or tractors.
Connects to the hitch on your tow vehicle.
High-strength nylon turf panels, rubber coated mesh panels, and durable thermoplastic scoops.
Used to pick up the sweeper assembly for easy emptying.
Captures collected debris and prevents lightweight items from escaping.
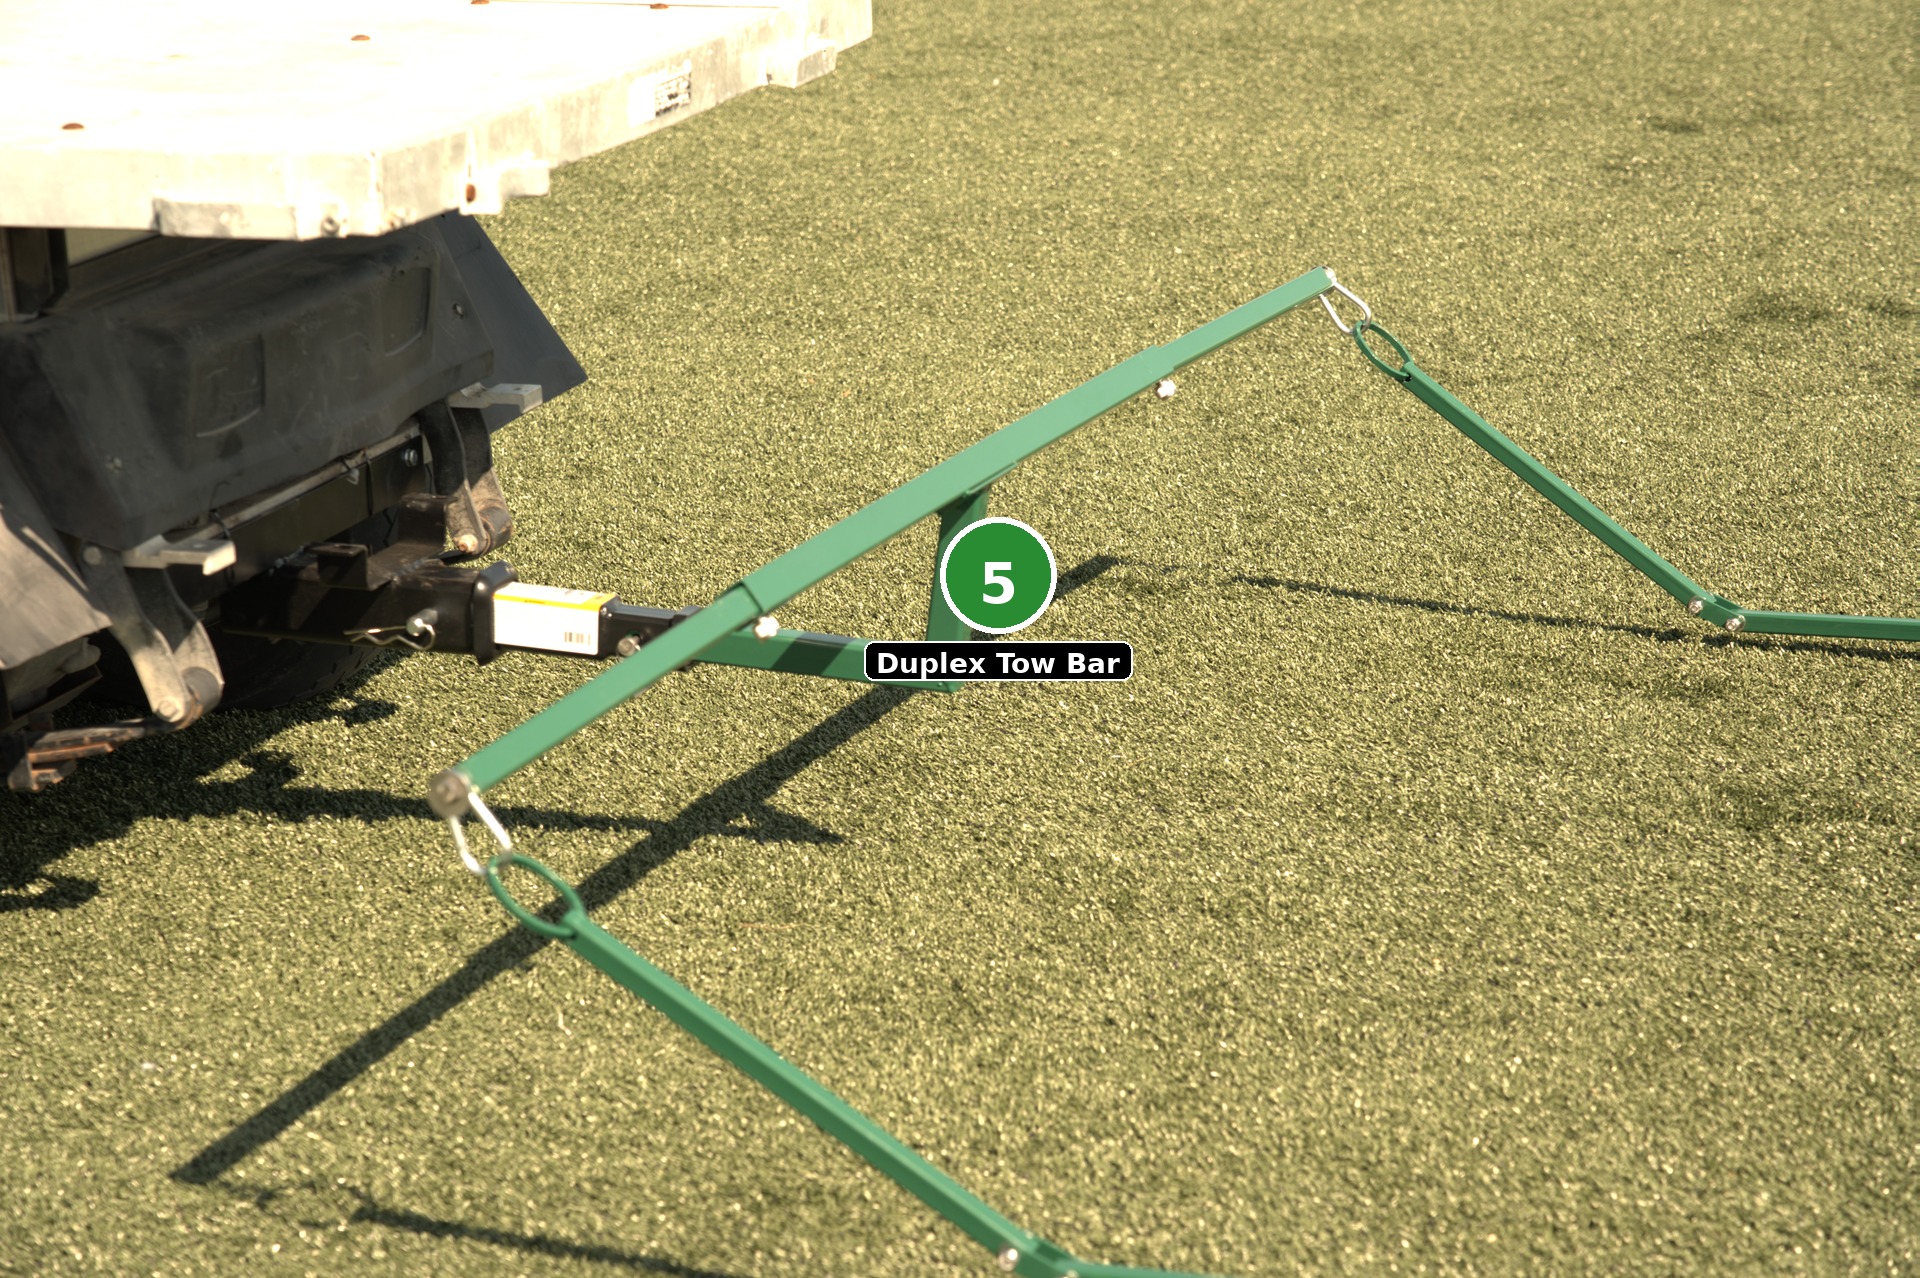
Pulls two sweeper assemblies side by side for wider coverage.
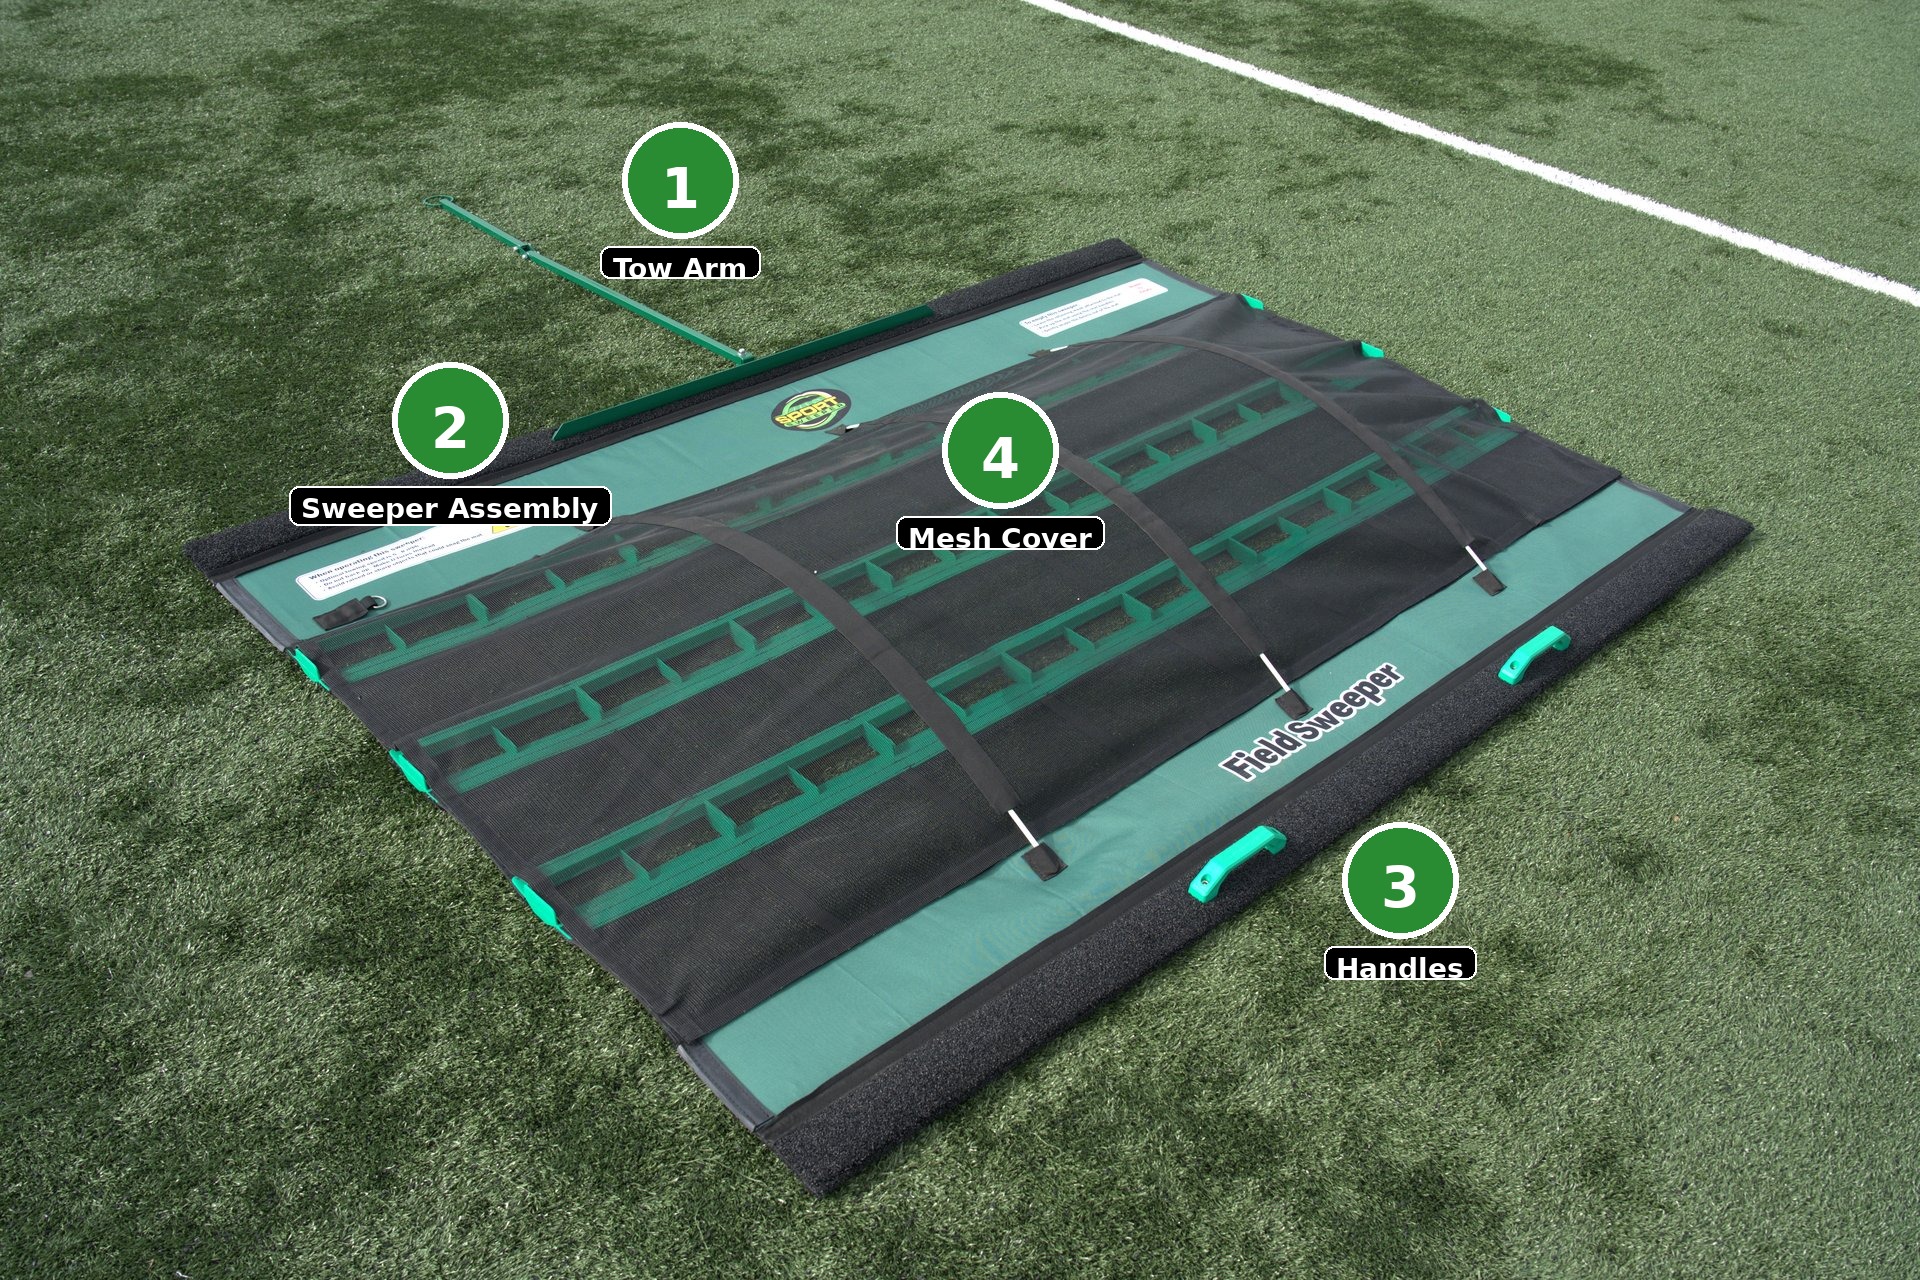
The fiberglass rods create a tent-like opening above the debris capture zones, ensuring lightweight debris can be collected without obstruction.


Follow these steps each time you use your SportSweeper™.
Remove the SportSweeper from its carrying case and position it behind the tow vehicle with the tow-arm side (front) closest to the vehicle and the handle side (rear) furthest away.
Install the fiberglass rods into the Mesh Cover and prepare the SportSweeper for usage. Ensure the Mesh Cover is properly positioned and secured.
Connect the SportSweeper's Tow Arm to the hitch on your tow vehicle. Verify the connection is secure before beginning.
Pull the SportSweeper in a regular grid pattern across your sports field at speeds between 5 mph and 10 mph.
While towing, debris will be collected by the thermoplastic scoops and accumulate on top of the Sweeper Assembly beneath the Mesh Cover.
Make gradual turns during operation for best results.
Regularly inspect the SportSweeper to ensure it does not become overloaded. Maximum total debris should never exceed 8 lbs.
When finished (or when full), pull the sweeper to a convenient location — preferably a hard surface — for emptying.
Pick up the rear of the Sweeper Assembly by the Handles and gently shake to dislodge collected debris. Debris will empty through the scoop openings.
Swing the rear of the sweeper 90° to the side so it's perpendicular to the tow vehicle. Lower it and use a broom or vacuum to collect debris.
Continue sweeping by pulling the tow vehicle forward (the Sweeper Assembly will realign automatically) — or disconnect the Tow Arm if done.
Remove fiberglass rods, roll up the Sweeper Assembly starting from the handle side, and place it back in its carrying case. Store in a cool, dry location.
Our team is available Monday–Friday, 8 am–5 pm CT.